App Builder On-Premises Prerequisites, Installation, and Configuration Guide
Prerequisites
This section lists the prerequisites to install the On-premises version of App Builder and is intended for System Administrators who configure operational parameters that maintain and support Linux/Mac OS/Windows.
Database Management
Based on your requirements you can decide to use either MySQL, MSSQL Server, or PostgreSQL database management systems.
MySQL Installation
1 - Install MySQL community edition (direct link for windows)
Select:
- Developer default, Next and Execute.
Note: if you get a prompt saying "one or more products requirements have not been satisfied. Do you want to continue?" Just select Yes)
After installation ends:
- Select next to configure the server, when prompted enter the root password you wish, then Execute.
- After the server configuration ends, select Cancel to exit the installer since the rest of the configuration is not needed.
2 - Allow container connection to MySQL.
Connect to MySQL with root user and password of step 1 and execute the following sql script (username and password will be the ones used from AppBuilder).
Note: you can use MySQL Workbench tool to execute sql scripts.
CREATE USER 'username'@'%' IDENTIFIED BY 'password';
GRANT ALL PRIVILEGES ON *.* TO 'username'@'%' WITH GRANT OPTION;
MSSQL Server Installation
1 - Install Sql Server (direct link)
On-Premises Sql Express Installation
Note: An On-premises server should have a real Sql Server not an embedded Sql Server Express of VS
2 - Enable tcp/ip - detailed explanation here.

SqlServer Config Manager
3 - Add a new App_Builder user part of Sql Express. You can install Sql Server Management Studio and use it for that purpose.
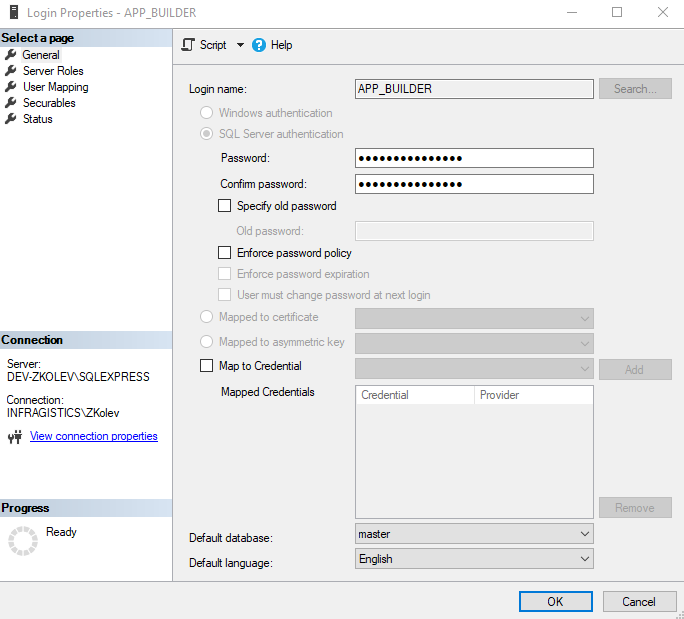
Login Parameters Dialog
Note: Create database permissions might be denied for the newly added user. You should consider giving them a Server Roles that will give them credentials to create database like
dbcreator.
Note: Based on administrator decision a change of authentication mode with SSMS might be required. SQL Server Database Engine is set to either Windows Authentication mode or SQL Server and Windows Authentication mode.
Install Docker
Windows guide -> docs.microsoft.com guide
Installation
This section assumes that you already have Docker and a database (MySQL, MSSQL Server, or PostgreSQL) installed.
First Time Installation
1 - Download the appbuilder.zip part of your Download section under the Infragistics Customer Portal.
2 - Extract the appbuilder.tar contained in the appbuilder.zip file.
3 - Open a terminal or command prompt window at the extracted location.
4 - Load and verify the image.
Run:
docker load --input appbuilder.tar
In order to verify that the image is correctly loaded, see the example with the table below:
docker images
| REPOSITORY | TAG | IMAGE ID | CREATED | SIZE |
|---|---|---|---|---|
| appbuilder | 1.0 | 2a05977e039b | 12 days ago | 854MB |
5 - Run the container:
docker run --restart always -p 80:5000 -e "ConnectionStrings:AppBuilderMySqlConnection=server=<your-mysql-database-ip>;database=<your-mysql-schema>;user=<your-mysql-database-user>;password=<your-mysql-database-password>;oldguids=false" -v <external-folder-for-logs>:/appbuilder/logs -v <external-folder-for-storage>:/appbuilder/storage --name appbuilder appbuilder:1.0
- MySQL example - This would be the command assuming your MySql instance is running a schema named IndigoAppBuilderOnPrem on 192.168.2.5 with username=appbuilder and password=appbuilder and that you have selected C:/AppBuilder as the external folder to store the logs and storage.
docker run --restart always -p 80:5000 -e "ConnectionStrings:AppBuilderMySqlConnection=server=192.168.2.5;database=IndigoAppBuilderOnPrem;user=appbuilder;password=appbuilder;oldguids=false" -v C:/AppBuilder/logs:/appbuilder/logs -v C:/AppBuilder/storage:/appbuilder/storage --name appbuilder appbuilder:1.0
- MSSQL Server example - This would be the command assuming your Sql Server instance is running a schema named IndigoAppBuilderOnPrem with SQLEXPRESS server, with USER ID=APP_BUILDER and password=Appbuilder2023! and that you have selected C:/AppBuilder as the external folder to store the logs and storage.
docker run --restart always -p 80:5000 -e "ConnectionStrings:Provider=SqlServer" -e "ConnectionStrings:AppBuilderSqlServerConnection=Data Source=DEV-ZKOLEV\SQLEXPRESS,1433;Database=IndigoAppBuilderOnPrem;User ID=APP_BUILDER;Password=Appbuilder2023!;Connect Timeout=15;Encrypt=False;TrustServerCertificate=False;ApplicationIntent=ReadWrite;MultiSubnetFailover=False" -v C:/AppBuilder/logs:/appbuilder/logs -v C:/AppBuilder/storage:/appbuilder/storage --name appbuilder appbuilder:1.0
6 - Open your browser and type http://localhost/
Note: If you are using Docker Desktop, go to Containers/Apps, find your container and click
Open in browser
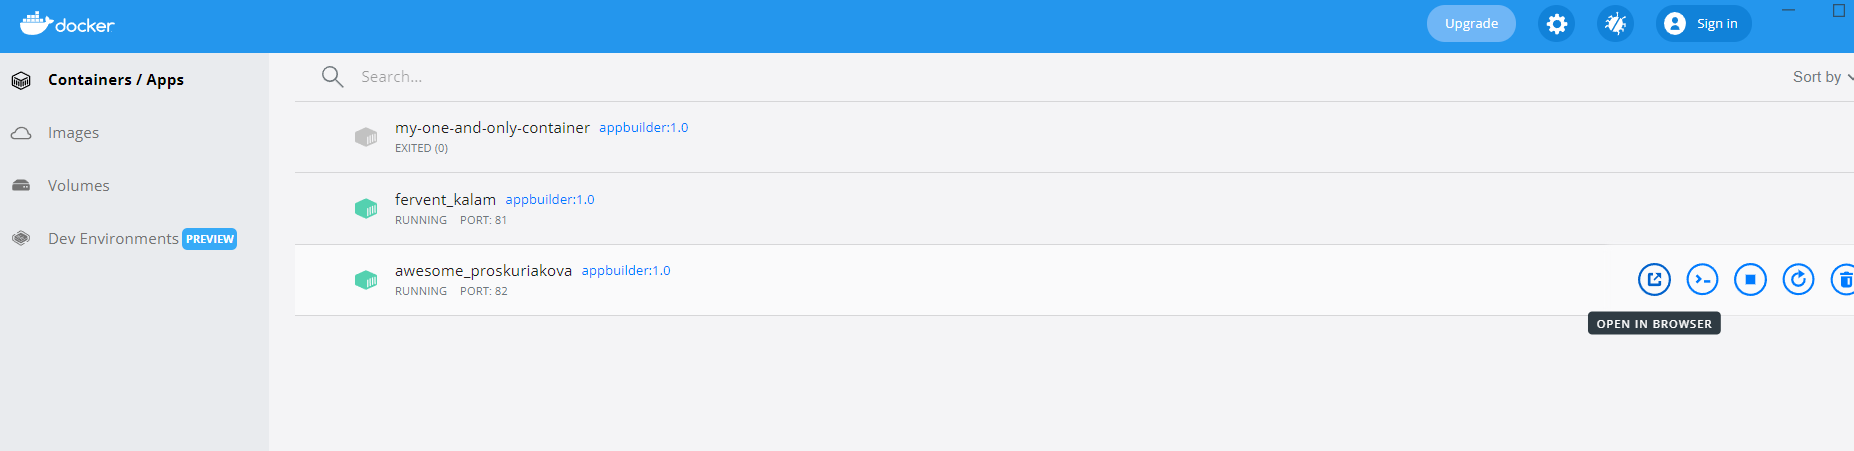
Docker Containers/Apps
Authentication with OpenID Connect (OAuth 2.0)
Follow the On-Prem Authentication with OpenID Connect (OAuth 2.0) topic for more information.
Updates
1 - Follow the first 4 steps of the first time installation with the newly published zip file
2 - Verify that the new image has loaded correctly (the old image should be tagged as
docker images
| REPOSITORY | TAG | IMAGE ID | CREATED | SIZE |
|---|---|---|---|---|
| appbuilder | 1.0 | 27ff4c1079ac | 43 hours ago | 932MB |
| 2a05977e039b | 12 days ago | 854MB |
3 - Stop the container
docker stop appbuilder
4 - Remove the container
docker rm appbuilder
5 - Run the container with the same command as the one used in step 5. of the first time installation
Activation
This section assumes that you already installed the On-premises instance and it is now up and running.
When the server is first started, a prompt dialog will provide you with Installation ID and a Authentication key will be requested. Send this Installation ID to our Sales department based on your region and we will provide you with Authentication key to activate the server.
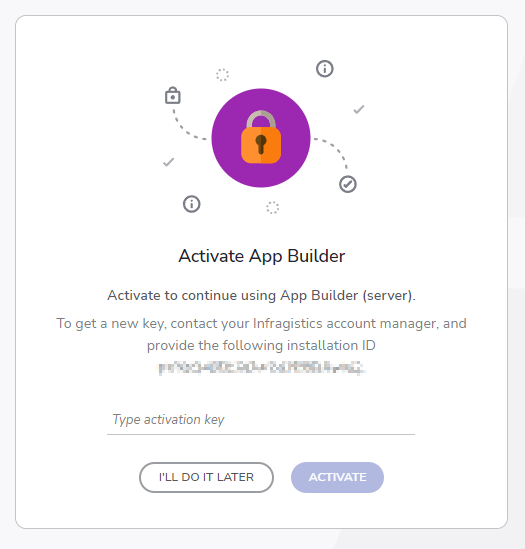
Activate App Builder
Note: You will receive a warning message directly through the UI thirty days before your key expires.
Configuration Overview
Default Configuration
When you start the AppBuilder Docker image without custom configuration, the following features are disabled by default:
- Database connection - No database credentials provided (must be configured via environment variables or config file)
- AI features - All AI functionality disabled
- AI Chat panel - Chat interface hidden
- Teams notifications - No external logging integrations
- Rate limiting - No request throttling
- GitHub/Azure DevOps integration - Publishing features disabled
Configuration Methods
You have two options to configure AppBuilder:
Option 1: Environment Variables (Quick Start)
Pass configuration directly as environment variables when starting the container:
docker run --restart always -p 80:5000 \
  -v C:/appbuilder/config:/appbuilder/config \
  -v C:/appbuilder/logs:/appbuilder/logs \
  -v C:/appbuilder/storage:/appbuilder/storage \
  --name appbuilder \
  appbuilder:1.0
Required directory structure:
/appbuilder/config/
├── appsettings.json                    # Main configuration overrides
└── ai/                                 # AI configuration (optional)
    ├── ai.appsettings.json             # AI provider and model settings
    ├── ai.providers.appsettings.json   # Provider endpoint configuration
    └── ai.credentials.appsettings.json # API keys and credentials
    └── ai.models.appsettings.json      # API models available
Configuration File Reference
| File | Purpose | Required | |
|---|---|---|---|
appsettings.json |
Main backend configuration - controls database, authentication, logging, storage, and integrations | ||
configs/ai/ai.appsettings.json |
AI feature settings - defines which AI provider and models to use | Only if AI enabled | |
configs/ai/ai.credentials.appsettings.json |
AI provider API keys - stores authentication credentials for AI services | Only if AI enabled | |
configs/ai/ai.providers.appsettings.json |
AI provider endpoints - configures API base URLs (rarely needs changes) | Only if AI enabled | |
configs/ai/ai.models.appsettings.json |
AI provider models | Only if AI enabled |
Note: If you don't plan to enable AI features, you can skip the AI configuration files entirely.
Main Configuration (appsettings.json)
Database Connection
The database connection settings determine where AppBuilder stores all application data including user projects, components, assets, and metadata.
{
  "ConnectionStrings": {
    "Provider": "MySql",
    "AppBuilderMySqlConnection": "server=host.docker.internal;port=3306;database=IndigoAppBuilder;user=root;password=yourpassword;oldguids=false",
    "AppBuilderSqlServerConnection": "Data Source=<server>;Database=<database>;User Id=<username>;Password=<password>;Encrypt=False;TrustServerCertificate=True;MultipleActiveResultSets=True",
    "AppBuilderPostgreSqlConnection": "Host=<hostname>;Port=5432;Database=<database>;Username=<username>;Password=<password>"
  }
}
| Option | Type | Description |
|---|---|---|
| Provider | string | Determines which database engine to use. Valid values: "MySql", "SqlServer", "PostgreSql". The application will only use the connection string that matches this provider value. |
| AppBuilderMySqlConnection | string | MySQL/MariaDB connection string. Used when Provider is "MySql". The oldguids=false parameter is required for proper GUID handling. Use host.docker.internal to connect to a database on the Docker host machine, or server=mysql to connect to a database hosted in a Docker container. Important: When using a containerized database, start the AppBuilder container with the --network option (e.g., docker run --restart always -p 8080:5000 --network appbuilder-network) |
| AppBuilderSqlServerConnection | string | SQL Server connection string. Used when Provider is "SqlServer". MultipleActiveResultSets=True is required for Entity Framework Core to work properly with SQL Server. |
| AppBuilderPostgreSqlConnection | string | PostgreSQL connection string. Used when Provider is "PostgreSql". Standard Npgsql connection string format. |
Logging Configuration
Controls how application logs are written and managed.
{
  "Logging": {
    "LogLevel": {
      "Default": "Debug",
      "System": "Warning",
      "Microsoft": "Warning"
    }
  },
  "CustomLogging": {
    "MinimumLevel": {
      "Default": "Information",
      "Override": {
        "Microsoft": "Warning",
        "System": "Warning",
        "Microsoft.EntityFrameworkCore": "Error"
      }
    },
    "Files": {
      "Paths": {
        "AI": "./logs/ai.log",
        "Backend": "./logs/backend.log",
        "DataProtection": "./logs/data-protection.log"
      },
      "RollingInterval": "Infinite",
      "FileSizeLimitBytes": 52428800,
      "RollOnFileSizeLimit": true,
      "FlushToDiskInterval": "00:00:01",
      "Retention": 90
    },
    "Teams": {
      "AIError": {
        "Enabled": false,
        "LogicAppUrl": "",
        "Period": "00:00:01",
        "TeamId": "",
        "ChannelId": ""
      },
      "DataProtection": {
        "Enabled": false,
        "Email": ""
      }
    }
  }
}
Teams Notifications
| Option | Description |
|---|---|
Teams.AIError.Enabled |
When true, AI errors are sent to a Microsoft Teams channel via Logic App webhook. |
Teams.AIError.LogicAppUrl |
URL of the Azure Logic App that posts to Teams. |
Teams.DataProtection.Enabled |
When true, data protection alerts are sent via email. |
Teams.DataProtection.Email |
Email address for data protection alerts. |
Rate Limiting Options
Controls request rate limiting to prevent abuse.
{
  "IPRateLimiterOptions": {
    "Enabled": false,
    "PermitLimit": 500,
    "SegmentsPerWindow": 10,
    "WindowSeconds": 60,
    "QueueLimit": 0,
    "QueueProcessingOrder": "OldestFirst"
  },
  "UserRateLimiterOptions": {
    "Enabled": false,
    "PermitLimit": 1000,
    "SegmentsPerWindow": 6,
    "WindowSeconds": 60,
    "QueueLimit": 0,
    "QueueProcessingOrder": "OldestFirst"
  }
}
| Option | Type | Description |
|---|---|---|
Enabled |
boolean | Whether rate limiting is active. Set to true to enable. For internal/trusted networks, can remain false. |
PermitLimit |
integer | Maximum requests allowed per window. IP limiter defaults to 500, User limiter to 1000. |
SegmentsPerWindow |
integer | Number of segments the time window is divided into. Used for sliding window algorithm. Higher values = smoother limiting. |
WindowSeconds |
integer | Time window size in seconds. Requests are counted within this rolling window. |
QueueLimit |
integer | Number of requests to queue when limit is exceeded. 0 means reject immediately. Higher values queue requests for later processing. |
QueueProcessingOrder |
string | Order to process queued requests. "OldestFirst" (FIFO) or "NewestFirst" (LIFO). |
IP Rate Limiter: Limits requests per IP address. Protects against individual bad actors.
User Rate Limiter: Limits requests per authenticated user. Protects against abuse by authenticated users.
GitHub Integration
Enables publishing projects to GitHub repositories.
Set disablePublishToGithub: false in
{
  "FrontendOptions": {
    "Extras": "{ disablePublishToGithub: false, disableSurvey: true, disableAnalytics: true, disableFeedback: true, requiresActivation: true }"
  }
}
{
  "GithubOptions": {
    "Enabled": true,
    "BaseUrl": "https://github.com/",
    "AuthorizeClientEndpoint": "/login/oauth/authorize",
    "AccessTokenEndpoint": "/login/oauth/access_token",
    "Scope": "user repo workflow",
    "RedirectUri": "/oauth/github/auth-callback",
    "ClientId": "<your-github-oauth-app-client-id>",
    "ClientSecret": "<your-github-oauth-app-client-secret>",
    "PackageAccessTokenSuffix": ""
  }
}
| Option | Type | Description |
|---|---|---|
BaseUrl |
string | GitHub base URL. Use "https://github.com/" for github.com or your GitHub Enterprise URL. |
AuthorizeClientEndpoint |
string | OAuth authorization endpoint path. Standard value, don't change unless using custom GitHub Enterprise. |
AccessTokenEndpoint |
string | OAuth token endpoint path. Standard value, don't change. |
Scope |
string | OAuth scopes to request. "user repo workflow" allows reading user info, accessing repositories, and triggering workflows. |
RedirectUri |
string | OAuth callback path. This must match what's configured in your GitHub OAuth App settings. |
ClientId |
string | GitHub OAuth App Client ID. Create an OAuth App at GitHub > Settings > Developer settings > OAuth Apps. |
ClientSecret |
string | GitHub OAuth App Client Secret. Keep this secret! |
Setup Steps:
- Go to GitHub > Settings > Developer settings > OAuth Apps > New OAuth App
- Set Homepage URL to your AppBuilder URL
- Set Authorization callback URL to
https://your-appbuilder-url/oauth/github/auth-callback - Copy Client ID and Client Secret to configuration
- Restart the container to include the changes
docker run --restart always -p 8080:5000 --network appbuilder-network -v C:/appbuilder/config:/appbuilder/config --name appbuilder -d appbuilder:2.0
Azure DevOps Integration
Enables publishing projects to Azure DevOps repositories.
Set disablePublishToDevOps: false in
{
  "FrontendOptions": {
    "Extras": "{ disablePublishToDevOps: false, disableSurvey: true, disableAnalytics: true, disableFeedback: true, requiresActivation: true }"
  }
}
{
  "DevOpsOptions": {
    "Enabled": true,
    "TokenEncryptionKeyBase64": "<generate-a-random-16-byte-base64-key>",
    "BaseUrl": "https://login.microsoftonline.com/",
    "TenantId": "common",
    "AuthorizeClientEndpoint": "oauth2/v2.0/authorize",
    "RedirectUri": "/oauth/devops/auth-callback",
    "AccessTokenEndpoint": "oauth2/v2.0/token",
    "RevokeTokenEndpoint": "https://graph.microsoft.com/v1.0/users/{userObjectId}/revokeSignInSessions",
    "Scopes": "499b84ac-1321-427f-aa17-267ca6975798/user_impersonation offline_access openid profile user.read",
    "ClientId": "<your-azure-ad-app-client-id>",
    "ClientSecret": "<your-azure-ad-app-client-secret>",
    "RestApiVersion": "7.1",
    "ExcludedOrganizations": []
  }
}
| Option | Type | Description |
|---|---|---|
TokenEncryptionKeyBase64 |
string | Key for encrypting stored OAuth tokens. Generate with openssl rand -base64 16. |
BaseUrl |
string | Azure AD login URL. Standard value for Microsoft identity platform. |
TenantId |
string | Azure AD tenant. Use "common" to allow any Microsoft account, or specify your tenant ID for single-tenant. |
Scopes |
string | OAuth scopes for Azure DevOps. The GUID is Azure DevOps' resource ID. Don't modify unless you know what you're doing. |
ClientId |
string | Azure AD App Registration Client ID. |
ClientSecret |
string | Azure AD App Registration Client Secret. |
RestApiVersion |
string | Azure DevOps REST API version. "7.1" is current stable version. |
ExcludedOrganizations |
array | List of Azure DevOps organizations to hide. Users won't see these orgs when publishing. |
Restart the container to include the changes docker run --restart always -p 8080:5000 --network appbuilder-network -v C:/appbuilder/config:/appbuilder/config --name appbuilder -d appbuilder:2.0
Email Configuration
Enables email notifications (optional).
{
  "EmailOptions": {
    "Smtp": {
      "Server": "smtp.your-server.com",
      "Port": "587",
      "User": "your-smtp-user",
      "Password": "your-smtp-password"
    }
  }
}
| Option | Type | Description |
|---|---|---|
Server |
string | SMTP server hostname. |
Port |
string | SMTP server port. Common values: "587" (TLS), "465" (SSL), "25" (unencrypted - not recommended). |
User |
string | SMTP authentication username. |
Password |
string | SMTP authentication password. |
AI Configuration
AI features are optional. To enable them, configure the files in configs/ai/.
ai.appsettings.json
Controls which AI provider and models are used.
{
  "AIOptions": {
    "Provider": "OPENAI",
    "Model": "gpt-4.1-mini",
    "SupportsVision": true
  },
  "ImageGeneration": {
    "Provider": "OPENAI",
    "Model": "gpt-image-1"
  },
  "GoogleCloudTranscribe": {
    "Enabled": false,
    "Credentials": "GoogleCloud",
    "Model": "latest_long",
    "DefaultLanguageCode": "en-US"
  }
}
| Option | Type | Description |
|---|---|---|
AIOptions.Provider |
string | Text generation provider. Values: "OPENAI", "ANTHROPIC", "GOOGLECLOUD", "GROQ" |
AIOptions.Model |
string | Text generation model ID. Must be a valid model for the selected provider (see table below). |
AIOptions.SupportsVision |
boolean | Whether the model can analyze images. Enable for models with vision capabilities. |
ImageGeneration.Provider |
string | Image generation provider. Values: "OPENAI", "GOOGLECLOUD", "RUNWARE" |
ImageGeneration.Model |
string | Image generation model ID. |
GoogleCloudTranscribe.Enabled |
boolean | Enable speech-to-text. Requires Google Cloud credentials. |
GoogleCloudTranscribe.DefaultLanguageCode |
string | Default language for speech recognition. E.g., "en-US", "de-DE", "fr-FR". |
Available Models:
| Provider | Text Models | Image Models |
|---|---|---|
| OpenAI | gpt-5.2, gpt-5.1, gpt-5-mini, gpt-5-nano, gpt-4.1, gpt-4.1-mini, gpt-4.1-nano |
gpt-image-1 |
| Anthropic | claude-sonnet-4-5-20250929, claude-haiku-4-5-20251001 |
- |
| Google Cloud | gemini-2.5-pro, gemini-2.5-flash, gemini-3-pro-preview |
imagen-4.0-generate-001, imagen-4.0-ultra-generate-001, imagen-4.0-fast-generate-001 |
| Groq | llama-3.3-70b-versatile, llama-3.1-8b-instant |
- |
| Runware | - | runware:100@1, runware:101@1 |
ai.credentials.appsettings.json
Stores API keys for AI providers.
{
  "AICredentialsOptions": {
    "OpenAI": {
      "ApiKey": "<your-openai-api-key>"
    },
    "Anthropic": {
      "ApiKey": "<your-anthropic-api-key>"
    },
    "Groq": {
      "ApiKey": "<your-groq-api-key>"
    },
    "Runware": {
      "ApiKey": "<your-runware-api-key>"
    },
    "GoogleCloud": {
      "JsonCredentials": {
        "type": "service_account",
        "project_id": "your-project-id",
        "private_key_id": "...",
        "private_key": "-----BEGIN PRIVATE KEY-----\n...\n-----END PRIVATE KEY-----\n",
        "client_email": "...",
        "client_id": "...",
        "auth_uri": "https://accounts.google.com/o/oauth2/auth",
        "token_uri": "https://oauth2.googleapis.com/token"
      }
    }
  }
}
Only configure the providers you plan to use. Get API keys from:
- OpenAI: https://platform.openai.com/api-keys
- Anthropic: https://console.anthropic.com/
- Groq: https://console.groq.com/
- Runware: https://runware.ai/
- Google Cloud: Create a service account in Google Cloud Console
Frontend Environment Settings
These settings are passed to the frontend application and control UI features and behavior.
{
  "FrontendOptions": {
    "Extras": "{ disableSurvey: true, disableAnalytics: true, disableFeedback: true, requiresActivation: true, disableAI: false, enableAIChat: true }"
  }
}
The Extras field is a JSON string containing frontend configuration flags:
| Setting | Default (On-Prem) | Description |
|---|---|---|
disableAI |
true |
Master switch for AI features. When true, all AI-related UI is hidden and AI APIs are not called. |
enableAIChat |
false |
Shows AI chat panel in the toolbox. The panel allows users to interact with AI for generating components and layouts. |
enableSpeechToText |
false |
Shows microphone button for voice input in AI chat. Requires Google Cloud Speech-to-Text to be configured. |
How it works: These values are injected into the frontend at runtime via the backend API. The frontend reads these flags on initialization and enables/disables features accordingly.
In order the AI functionality to work you should provide the required credentials, models and settings in these files ai.appsettings.json, ai.credentials.appsettings.json, ai.providers.appsettings.json, ai.models.appsettings.json.
Docker Image Installation and Running the Container
Volume Mounts
| Container Path | Purpose | Required |
|---|---|---|
/app/appsettings.json |
Main configuration | Yes |
/app/configs/ai/ |
AI configuration files | Only if AI enabled |
/app/storage/ |
File storage (uploads, exports) | Yes (for persistence) |
/app/logs/ |
Log files | Recommended |
Docker Run Commands
Load the image
docker load -i appbuilder.tar
Run the container providing only an environment variable for DB connection
docker run --restart always -p 80:5000 \
  -e "ConnectionStrings:AppBuilderSqlServerConnection=Data Source=<server>,<port>;Database=<db-name>;User ID=<user>;Password=<password>;Encrypt=False;TrustServerCertificate=False;MultipleActiveResultSets=True" \
  -v C:/appbuilder/logs:/appbuilder/logs \
  -v C:/appbuilder/storage:/appbuilder/storage \
  --name appbuilder \
  appbuilder:1.0
Run the container when custom configuration is mounted -v C:/appbuilder/config:/appbuilder/config \
If you want to connect to database running in separate docker container:
The appsettings file set the connection string to : AppBuilderMySqlConnection": "Server=mysql;Port=3306;Database=AppBuilder;User=user;Password=password;,
Create docker network and include the mysql.
Provide the network in the start command.
docker run --restart always -p 80:5000 \
  --network appbuilder-network \
  -v C:/appbuilder/config:/appbuilder/config \
  -v C:/appbuilder/logs:/appbuilder/logs \
  -v C:/appbuilder/storage:/appbuilder/storage \
  --name appbuilder \
  appbuilder:1.0
If you want to connect to database running ion the host PC for server use host.docker.internal:
The appsettings file set the connection string to : AppBuilderMySqlConnection": "server=host.docker.internal;Port=3306;Database=AppBuilder;User=user;Password=password;,
docker run --restart always -p 80:5000 \
  -v C:/appbuilder/config:/appbuilder/config \
  -v C:/appbuilder/logs:/appbuilder/logs \
  -v C:/appbuilder/storage:/appbuilder/storage \
  --name appbuilder \
  appbuilder:1.0
Quick Start Checklist
Minimum Setup
- Update
ConnectionStringsin appsettings.json or use the environment override option (flag)
With Authentication
- Complete minimum setup
- Set
SkipAuthtofalse - Configure OAuth provider (Azure AD, Okta, Keycloak, etc.)
- Set
Authority,ClientIdin AuthSettings
With AI Features
- Complete minimum setup
- Get API key from your chosen AI provider
- Configure
ai.appsettings.jsonwith provider and model - Add API key to
ai.credentials.appsettings.json - Set
disableAI: falseandenableAIChat: trueinappsetting.jsonfile inFrontendOptions
With GitHub/DevOps Integration
- Create OAuth App (GitHub) or App Registration (Azure AD)
- Configure callback URLs in provider
- Add Client ID and Secret to configuration
Troubleshooting
Log Locations
| Log File | Contents |
|---|---|
./logs/appbuilder.log |
API requests, authentication, general errors related |
./logs/codegen.log |
API requests, authentication, general errors related |
./logs/ai.log |
AI provider requests and responses |
Common Issues
Database connection failed
- Verify connection string format matches your provider
- Check database server is accessible from container
- For Docker Desktop on Windows/Mac, use
host.docker.internalinstead oflocalhost - Ensure database user has permissions to create tables
CORS errors in browser
- Add your exact origin (including protocol and port) to
CorsPolicy.Origins - Check browser console for the actual origin being blocked
AI features not working
- Verify
disableAI: falsein frontend environment - Check API key is valid and has credits
- Review
ai.logfor specific error messages - Ensure model name exactly matches available models
File uploads fail
- Verify storage directory exists and is writable
- Check
MaxImageSizeMbif uploading large images - Ensure volume is mounted correctly in Docker
Authentication not working
- Verify
SkipAuthisfalse - Check
AuthorityURL is accessible - Verify callback URLs match in both config and OAuth provider
- Check browser console for OAuth errors
Docker Desktop on Windows
Docker Desktop on Windows is not starting automatically without Login to Windows machine Docker Desktop on Windows - Docker team doesn't recommend Docker Desktop for production workloads. You should use Docker on a Linux box or Docker for Windows Server if you want Windows containers.
Additional Resources
- On-Prem Authentication with OpenID Connect
- App Builder Deployment Configuration Flags
- External Resources Whitelisting
- App Builder Interface Overview
- Single Page And Navigation
- App Builder Components
- Flex Layouts
- Running Desktop App
- Generate app
- Indigo.Design Getting Started
 GitHub